Hey there! As a supplier of toy needle detectors, I know how important it is to keep these machines in tip - top shape. A clean toy needle detector not only ensures accurate detection but also extends the lifespan of the equipment. In this blog, I'll share some practical tips on how to clean a toy needle detector.
Why Cleaning is Crucial
First off, let's talk about why cleaning your toy needle detector is so important. Over time, dust, dirt, and small debris can accumulate on the detector's surface and inside its components. This buildup can interfere with the detector's magnetic field and sensors, leading to false alarms or inaccurate detections. Moreover, if the detector is used in a manufacturing environment where there are fibers or other small particles, these can clog the machine and cause it to malfunction.

Pre - cleaning Preparations
Before you start cleaning your toy needle detector, there are a few things you need to do. First, make sure the machine is turned off and unplugged from the power source. This is a safety measure to prevent any electrical shocks. Next, gather the necessary cleaning supplies. You'll need a soft, lint - free cloth, a mild cleaning solution (like a mixture of water and a little dish soap), and a small brush for hard - to - reach areas.
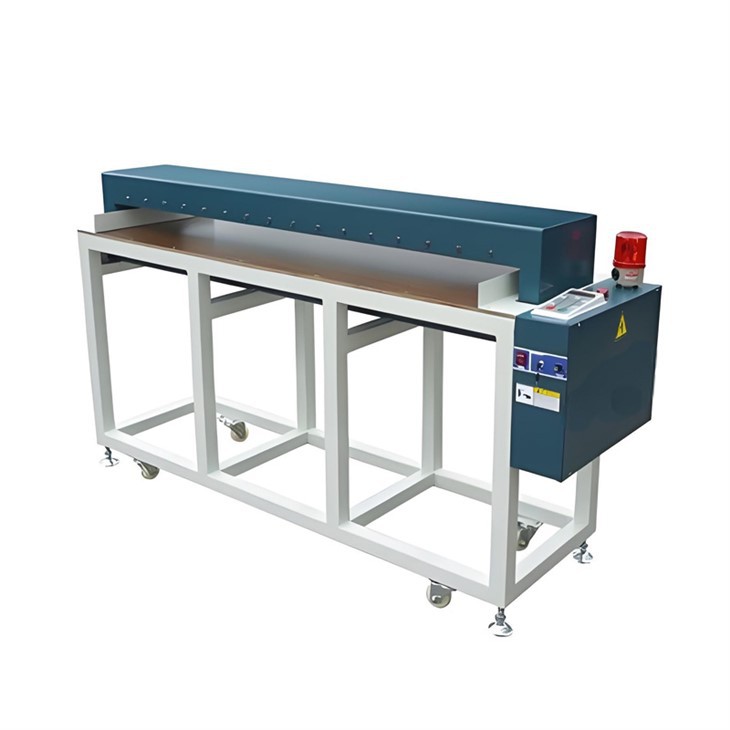
Cleaning the Exterior
The exterior of the toy needle detector is the first thing you'll want to clean. Start by using the dry, soft cloth to wipe away any loose dust or debris. Pay special attention to the control panel, buttons, and display screen. If there are stubborn stains, dampen the cloth with the mild cleaning solution and gently wipe the affected areas. Avoid getting the solution into the buttons or any openings on the machine.
For the body of the detector, you can use the same damp cloth to clean it. Make sure to clean all sides, including the top and bottom. If there are any labels or markings on the machine, be careful not to damage them while cleaning.
Cleaning the Detection Area
The detection area is the heart of the toy needle detector, and it needs to be cleaned carefully. Use the small brush to gently remove any dust or debris from the detection opening. Be very gentle not to scratch the sensors or any other sensitive components.
If there are sticky substances or more stubborn dirt in the detection area, you can use a cotton swab dipped in a small amount of rubbing alcohol. Rubbing alcohol evaporates quickly and won't leave any residue. However, make sure to let the area dry completely before turning the machine back on.
Cleaning the Conveyor Belt (if applicable)
Many toy needle detectors come with a conveyor belt. Cleaning the conveyor belt is essential for smooth operation. First, remove any large objects or debris from the belt. Then, use the damp cloth to wipe the surface of the belt. If there are stains, you can use a mild cleaning solution, but make sure to rinse the cloth thoroughly to avoid leaving soap residue on the belt.
For the rollers and other moving parts of the conveyor belt, use the small brush to clean them. Make sure to remove any dirt or debris that could cause the belt to slip or malfunction.
Cleaning the Internal Components (with caution)
Cleaning the internal components of a toy needle detector should be done with extreme caution. If you're not familiar with the machine's internal structure, it's best to consult the user manual or contact a professional technician.
However, if you're confident in your abilities, you can carefully remove the access panels (if possible) to clean the internal parts. Use the dry cloth and the small brush to remove dust and debris. Avoid using any liquids inside the machine unless specifically recommended by the manufacturer.
Regular Maintenance Schedule
To keep your toy needle detector in good condition, it's important to establish a regular cleaning and maintenance schedule. Depending on how often the machine is used, you might want to clean it weekly or monthly. Regular cleaning will prevent major problems and ensure that the detector works accurately at all times.
Troubleshooting After Cleaning
After cleaning the toy needle detector, it's a good idea to test it. Turn the machine on and run a few test items through it to make sure it's still detecting needles accurately. If you notice any issues, such as false alarms or no detections, double - check that you've cleaned all the components properly. It could also be a sign of a more serious problem, in which case you should contact the manufacturer or a professional technician.
Our Product Range
As a supplier, we offer a wide range of high - quality toy needle detectors. For example, our Non Driving Non - woven Needle Detector is perfect for non - woven materials. It has advanced detection technology and is very reliable.
Our Metal Needle Inspector is another great option. It can detect even the smallest metal needles in toys and other products. And if you need to inspect wide - width items, our Wide Width Needle Inspection Machine is the ideal choice.
Conclusion
Cleaning a toy needle detector is not a difficult task, but it does require some attention to detail. By following the steps outlined in this blog, you can keep your detector in excellent condition and ensure accurate needle detection. If you're in the market for a new toy needle detector or have any questions about our products, don't hesitate to contact us for a purchase consultation. We're here to help you find the best solution for your needs.
References
- Manufacturer's user manuals for toy needle detectors
- Industry best practices for cleaning and maintaining detection equipment